Development of an Autonomous Robot for Detecting and Collecting Objects
This past summer, I attended a lecture on autonomous mobile robots at my university in Mannheim. The topic fascinated me, and in this post, I want to share a few details about the project we performed and the paper we published.
We aimed to build an autonomous robot capable of detecting and collecting given objects in a room and moving them to another given object (a target to search for and a goal essentially). As a base for our robot, we used a TurtleBot Burger, equipped with two servomotors, a microcontroller, and a Raspberry Pi for onboard computation. Additionally, we mounted a Raspberry Pi cam to the front of the TurtleBot as well as a fork to collect the objects. This is what the final result looked like:
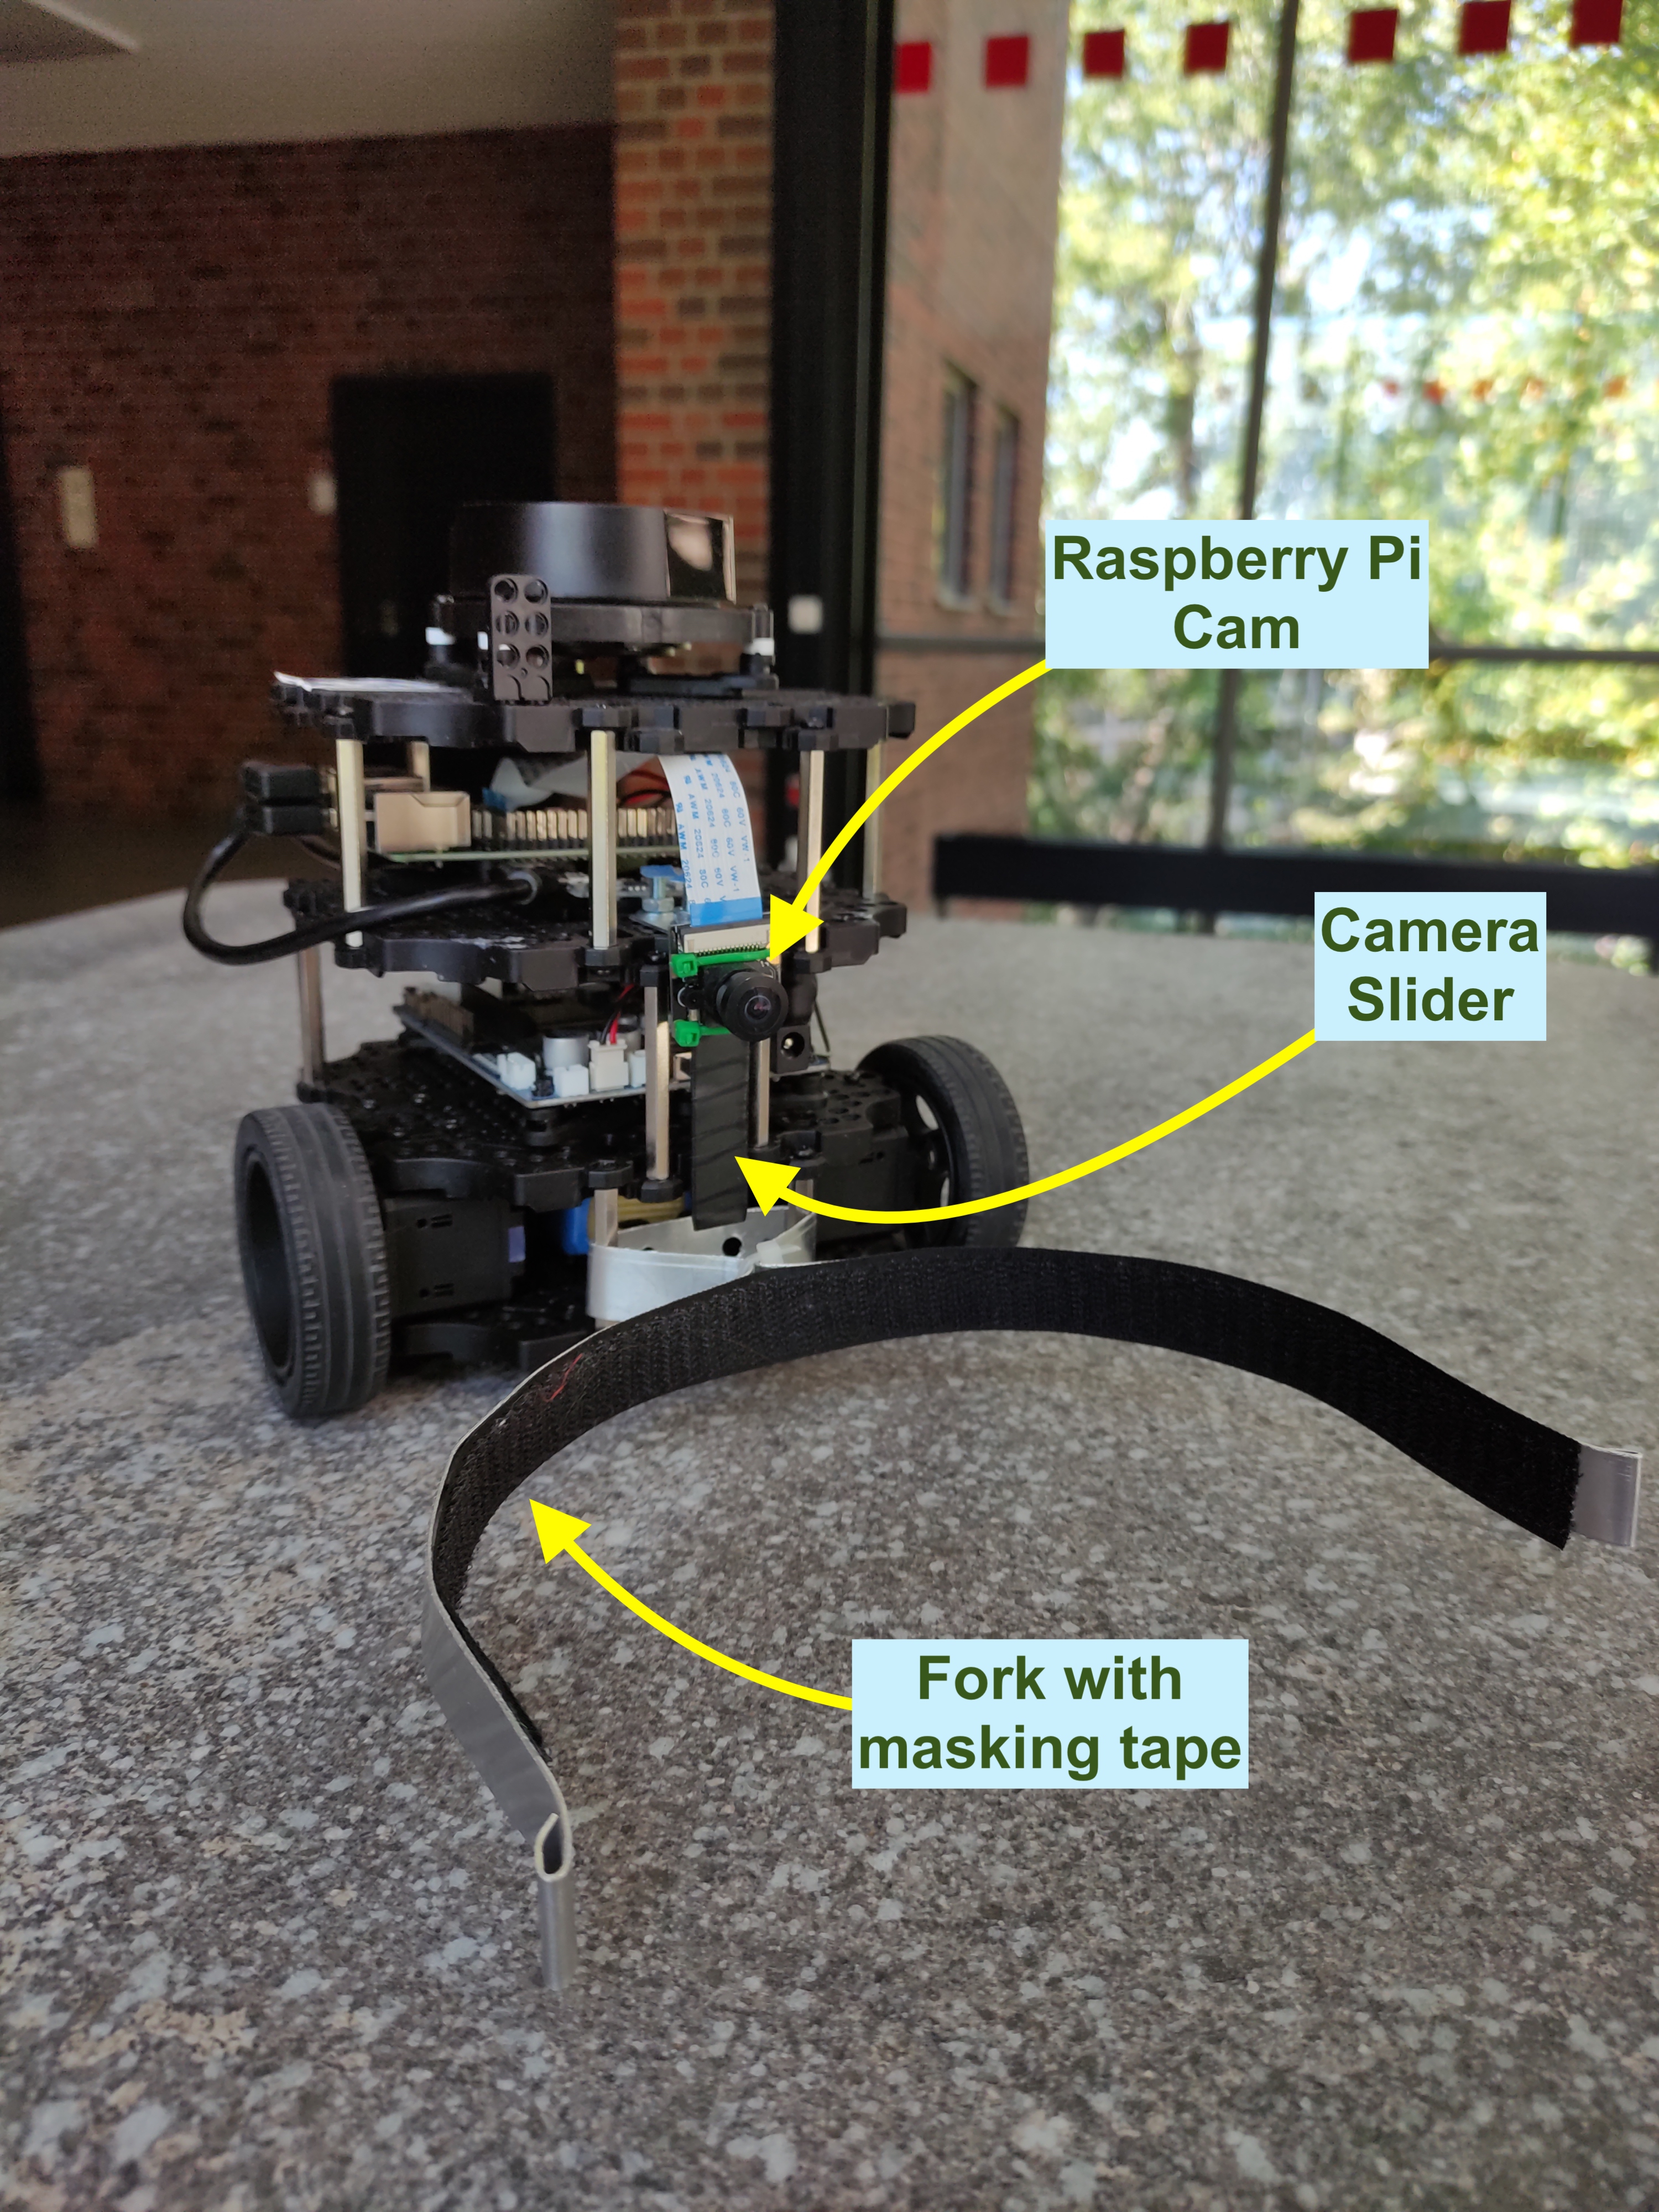
We used YOLO for object detection and for adjusting the camera in a way it would detect our dummy object of choice (a tennis ball) in all situations, we mounted it with a little rail for up and down adjustments.
Now let’s dive into the software technicalities. Besides YOLO for object detection through the front camera, we used ROS to control the robot. The TurtleBot was specifically designed to work with ROS and has a ready-to-use SDK. ROS works with a publisher/subscriber model, where data is published by a node to a topic and from there can be subscribed to and processed by another node. In our case, this landscape looks as follows:

The information flow starts from the left with the camera node, which publishes the raw camera image taken from the front camera and publishes it to the detect node. The detect node identifies the object and publishes the position to the control node. This is done by a Vector3 class, only considering x for the left and right position and y for the forward distance indication, while z was used to pass along the object class.
The control node consists of if statements (see picture below) deciding on the direction the robot should move depending on whether the desired object was found, how far away it is, and whether it is to the left or right of the robot. The TurtleBot core node then is sent an angle and speed in form of a Twist class. As you’ll notice in the source code, we had to debug the coordinate values a bit to make them work as intended and the robot move the right way in the real world.
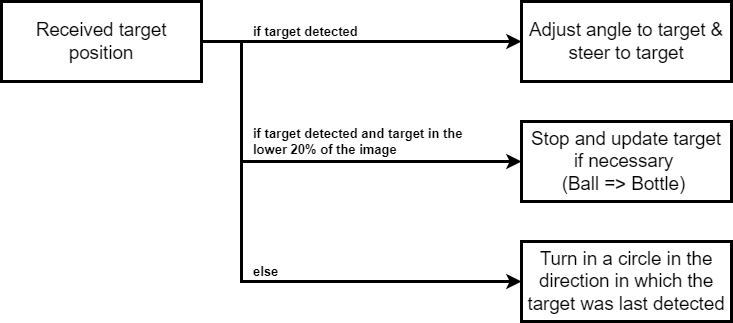
As mentioned above we use a tennis ball as a target in our tests. Once the target is found and collected, the robot searches for the goal, in our case a water bottle. Once the robot reaches the bottle, the program ends. A built-in reset mechanism allows you to stop and reset the search and collect program by placing a cup in front of the camera, once the cup is removed, the search starts form anew.
To make the whole thing a more visual and fun experience to watch, we set up a small Flask web app with a live video stream from the robot’s front camera along with a mission statement. This is the fifth node called the cockpit node.
But now enough with the words, hers is a video demonstration of the robot.
We also wrote a more scientific text on the setup and the things we discovered while performing this project. The paper also goes into detail about YOLO and its differences in performance.
Citation and link to the paper: Bracke, A., Gosein, D., Kürschner, M., Mayer, J., & Seefeld, J. (n.d.). Development of an Autonomous Robot for Detecting and Collecting Objects (p. 12) [Working Paper] URN: urn:nbn:de:bsz:953-opus-1006
The source code for the entire project is available on GitHub. We tried to build the repository in a way that one can easily clone and run the same thing on their TurtleBot. The repo includes some instructions for that.

I hope you enjoyed reading this article and maybe had fun trying it out yourself!